
Create a meeting note and start typing
Create a dated meeting note, answer one question, and start typing under Notes. Then use the same {{CURSOR}} marker to add an update to an existing project note.
These examples require QuickAdd 2.27.0 or later. They use QuickAdd’s own templates, so you do not need Templater.
Create the meeting template
Section titled “Create the meeting template”Imported the package above? Both templates and both choices are already set up, so skip to Run it and start typing.
Create folders named Templates and Meetings in your vault. In Templates, create a note named Meeting and paste this content:
# {{VALUE:Meeting}}
Date: {{DATE:YYYY-MM-DD}}
## Notes- {{CURSOR}}
## Next steps- [ ]
{{VALUE:Meeting}} asks for the meeting name. {{DATE:YYYY-MM-DD}} fills in today’s date. {{CURSOR}} marks where you want to type after QuickAdd creates the note.
Configure the choice
Section titled “Configure the choice”-
Open Settings → QuickAdd and choose New choice → Template.
-
Click the choice name at the top of the settings window. Rename it
New meetingand confirm with Ok. -
Set Template path to
Templates/Meeting.md. -
In File name, enter (before QuickAdd 2.30.0, this is File name format; turn its toggle on first):
{{DATE:YYYY-MM-DD}} {{VALUE:Meeting}} -
Set New note location to In a specific folder.
-
Enter
Meetingsin Folder path and click Add. -
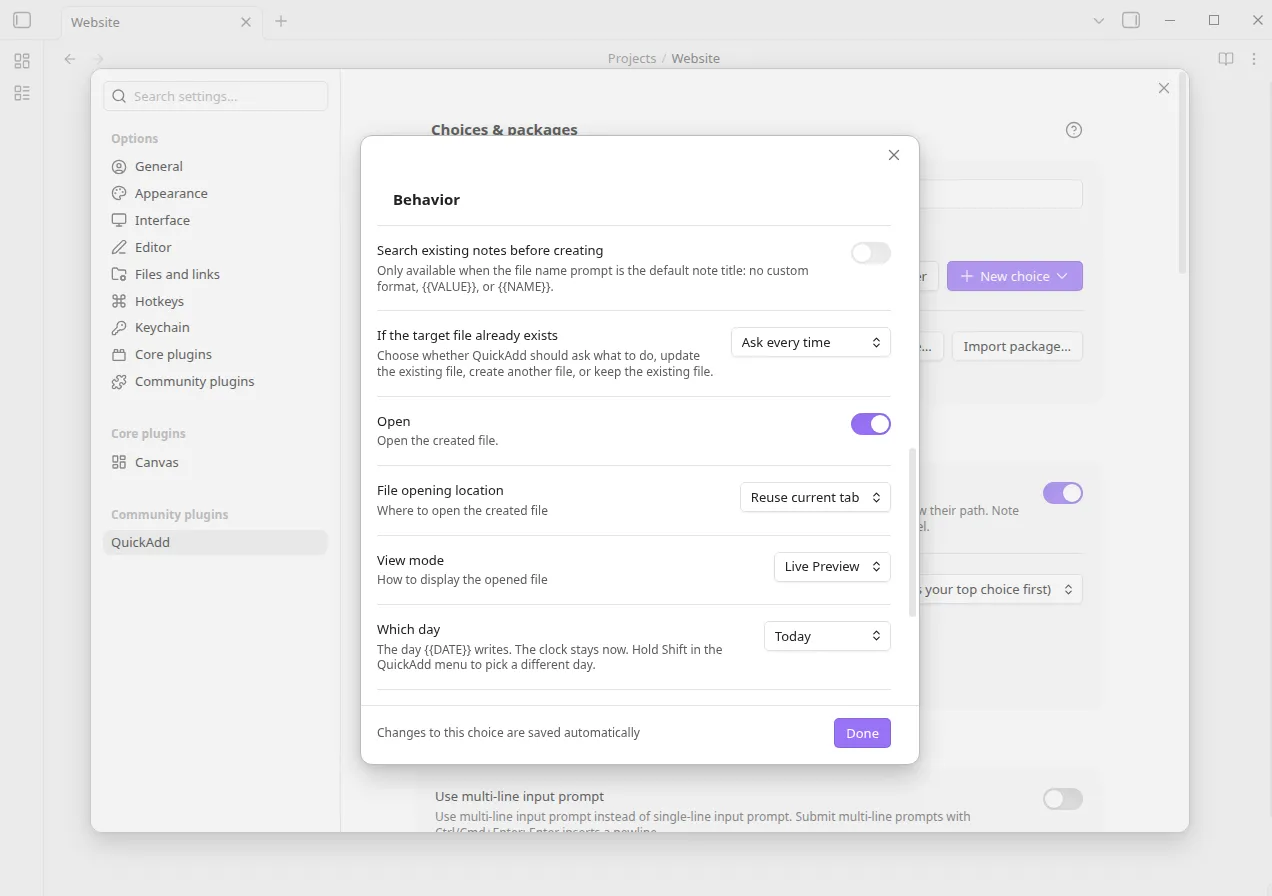
Turn Open on.
-
Set File opening location to Reuse current tab and View mode to Live Preview.
-
Choose Done and close Settings.
Run it and start typing
Section titled “Run it and start typing”- Open Obsidian’s command palette and run QuickAdd: Run.
- Choose New meeting.
- Enter
Website planningfor Meeting and choose Ok. - Without clicking in the note, type
Agree on the first three pages.
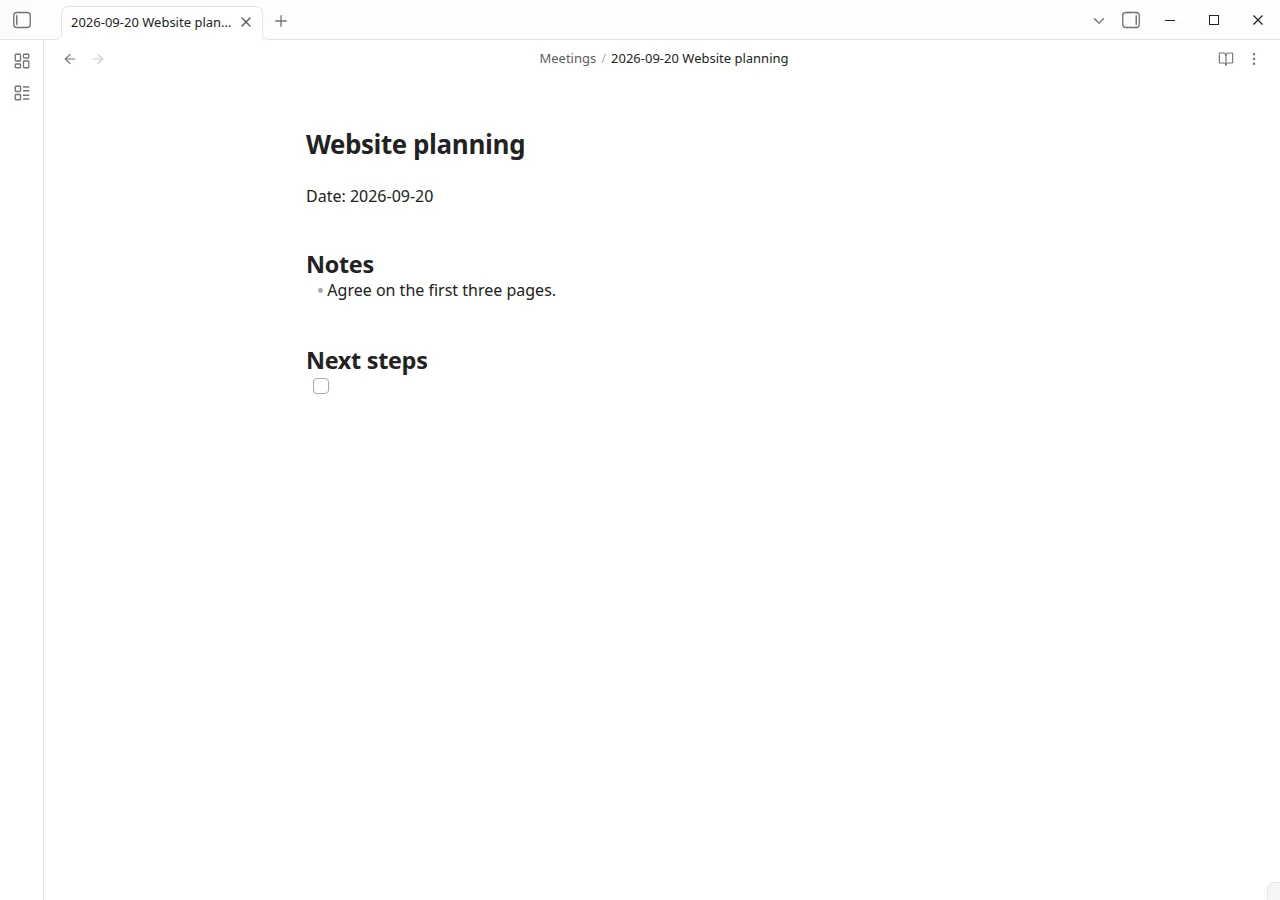
QuickAdd creates a note in Meetings with today’s date in the file name. On September 20, 2026, that file is Meetings/2026-09-20 Website planning.md:
# Website planning
Date: 2026-09-20
## Notes- Agree on the first three pages.
## Next steps- [ ]
The marker is gone, and your sentence appears in the first bullet under Notes. QuickAdd uses your meeting name in both the file name and the heading without asking twice.
To start in Next steps instead, remove the marker from Notes and change the checklist line to - [ ] {{CURSOR}}. The first marker in the note body sets the cursor position. QuickAdd removes any additional markers.
Add an update to an existing project
Section titled “Add an update to an existing project”Use a second template when you want to keep a project’s history in one note.
Imported the package? Open a project note in Live Preview, click in the note body, and run Add project update from the command palette. The steps below build the same thing by hand.
-
Create a
Templatesfolder if you do not already have one. CreateTemplates/Project update.mdwith:## Update - {{DATE:YYYY-MM-DD}}### Progress- {{CURSOR}}### Next steps- [ ] -
Open Settings → QuickAdd.
-
Under Template folders, click Add folder (or +, once you have a folder) and choose
Templates. IfTemplatesis already listed, leave it as it is. Before QuickAdd 2.30.0, the setting is Template folder paths under Templates & properties: enterTemplatesand click Add. -
Close Settings.
-
Create a
Projectsfolder andProjects/Website.mdwith:# WebsiteBuild a clear three-page site for the pottery studio.## Decisions- Start with Home, Work, and Contact. -
Open
Projects/Website.mdin Live Preview or Source mode and click in the note body. -
From the command palette, run QuickAdd: Apply template to active note.
-
Choose Template: Templates/Project update.md.
-
Choose Append to bottom.
-
Without clicking in the note, type
The homepage draft is ready for review.
The file keeps its name, description, and Decisions section. QuickAdd adds a dated section at the bottom:
## Update - 2026-09-20
### Progress- The homepage draft is ready for review.
### Next steps- [ ]
Recorded in Obsidian; played at twice the original speed.
Apply this template again for the next update. You do not need a separate Template choice for this workflow.
Use the marker in your own templates
Section titled “Use the marker in your own templates”Put {{CURSOR}} wherever you want to continue typing in the note body. The destination must be focused in an editing mode. For a Template choice that creates a note, turn Open on and choose Live Preview or Source. If you open a new tab or pane, also turn Focus new pane on.
For a note you already have open, use Live Preview or Source mode. The marker does not switch a note out of Reading view or bring a background tab into focus.
See cursor position for the full behavior and Apply Template to Note for the other insertion modes.